How to fill gaps in marble stone
Marble Joint Filling Technology: A Comprehensive Professional Operation Guide
Marble, with its natural texture and unique veining, stands as a premium choice for floor paving, countertop fabrication, and decorative applications. However, during long-term use, gaps tend to form between marble slabs due to factors such as installation inaccuracies, thermal expansion and contraction, and daily wear and tear. These gaps not only compromise the overall aesthetics of the marble but also lead to moisture infiltration and dirt accumulation, which may further cause structural damage to the stone. To achieve a seamless, durable, and visually integrated repair effect, marble joint filling requires precise craftsmanship, suitable materials, and standardized operations. This professional guide systematically elaborates on the step-by-step operation process, material selection criteria, and key precautions for marble joint filling.
I. Core Pre-construction Considerations
Before conducting joint filling work, the following key factors must be evaluated to determine the optimal construction plan:
Joint Specifications and Types
Accurately measure the width and depth of the gaps. Small gaps with a width ≤ 3mm are common in standard installation projects, while large gaps with a width > 3mm are mostly caused by structural settlement or improper installation. Meanwhile, it is necessary to distinguish between shallow surface gaps and deep gaps that penetrate the full thickness of the slabs.
Marble Substrate Condition
Inspect the marble surface for integrity, cracks, or damage. Ensure the area surrounding the gaps is clean and dry, as contaminants can significantly reduce the bonding performance of the filling material.
Service Environment Conditions
Clarify the application scenario of the marble (e.g., kitchen countertops, bathroom floors, outdoor terraces, etc.). For kitchen and bathroom areas, filling materials with water and oil resistance should be selected, while for outdoor areas, materials with excellent weather resistance are required.
II. Selection of Marble Joint Filling Materials
The correct selection of filling materials is crucial to the success of joint filling projects. The chosen materials must match the color and texture of the marble, possess strong adhesion, and adapt to the actual service environment. Below are the commonly used professional-grade filling materials in the industry:
Marble-specific Epoxy Resin (Marble Adhesive)
Marble-specific epoxy resin, also known as marble adhesive, is the preferred material for most marble joint filling scenarios. This material features high bonding strength, high hardness after curing, and can be sanded and polished to achieve a seamless integration with the marble surface. Its core advantages are as follows:
Easy Color Matching: Natural inorganic pigments (such as marble powder) can be incorporated to precisely match the original color and texture of the stone.
Durable and Weather-resistant: It exhibits water resistance, oil resistance, and resistance to daily wear and tear.
Wide Application Range: It can be used to fill small gaps ≤ 3mm and medium gaps of 3–10mm. For large gaps, marble gravel can be mixed in to enhance structural stability.
Precautions: High-quality epoxy resin with a particle fineness ≥ 300 mesh should be selected to ensure good polishing performance and color stability of the material.
Stone-specific Joint Sealant
Stone-specific joint sealant is a cement-based material developed for natural stones, suitable for filling small to medium gaps of 1–5mm in marble floors. Its core characteristics are as follows:
High Strength and Durability: It provides reliable structural support and excellent compressive performance.
Cost-effective: It is more affordable than epoxy resin, making it suitable for large-area filling projects.
Mold and Water Resistant: Waterproof variants are available, suitable for humid environments such as bathrooms.
Precautions: The use of ordinary cement mortar is strictly prohibited, as such materials are prone to causing discoloration of marble and have poor bonding performance.
Silicone Sealant
Silicone sealant is a polymer elastic material, suitable for marble joint filling scenarios that require flexibility, such as outdoor marble paving or areas prone to thermal expansion and contraction. Its core advantages are as follows:
Excellent Weather Resistance: It can withstand extreme temperature differences, ultraviolet radiation, and erosion from humid environments.
Good Flexibility: It can adapt to slight displacement of marble slabs and prevent cracking of the filling layer.
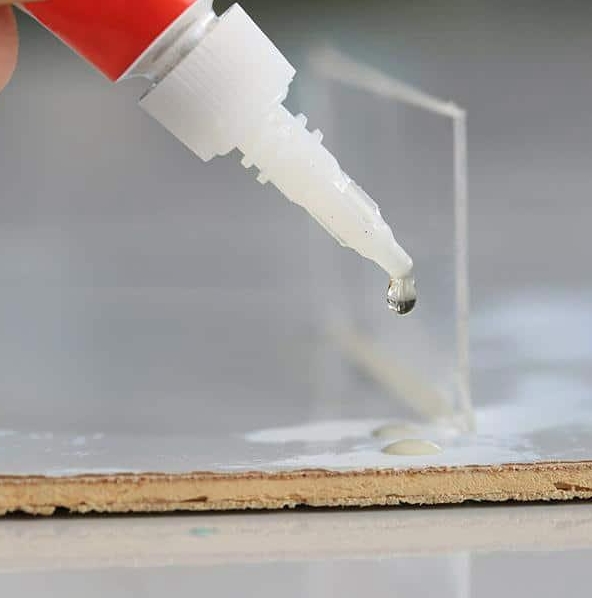
Easy Construction: It can be evenly applied using a caulking gun, suitable for filling irregularly shaped gaps.
Precautions: Neutral silicone sealant should be selected to avoid chemical reactions between acidic sealant and marble that may cause stone damage. This material is not suitable for high-gloss marble surfaces, as it is difficult to polish to the same gloss level as the stone.
III. Step-by-step Operation Guide for Marble Joint Filling
The following operation process takes the most widely used marble-specific epoxy resin as an example. In actual construction, adjustments should be made according to the selected materials and joint characteristics.
Construction Preparation: Gap Cleaning and Drying
Thorough cleaning is a prerequisite for ensuring firm bonding of the filling material. Dust, debris, and stains in the gaps can severely affect the bonding effect.
Remove Old Fillers: If there is old joint sealant or silicone sealant in the gaps, completely remove it using a utility knife, joint cleaning tool, or small chisel. For wider gaps, a handheld cutting machine equipped with a 0.2mm joint cleaning blade can be used for cleaning. During operation, keep the blade perpendicular to the marble surface to prevent chipping of the stone.
Clean the Gaps: Use a narrow-nozzle vacuum cleaner to suck up dust and debris in the gaps. For stubborn stains such as oil stains and mold, wipe the edges of the gaps with a neutral cleaner (avoid acidic or alkaline cleaners to prevent corrosion of marble) and a clean cloth, then rinse with clean water and dry with a dry cloth or air-dry for at least 24 hours to ensure the gaps are completely dry before filling.
Color Matching (A Key Step Affecting Aesthetics)
To achieve a seamless visual effect, the filling material must be highly consistent with the color and texture of the marble.
Place a small amount of the selected filling material (e.g., epoxy resin) in a disposable container.
Add natural inorganic pigments (such as the same type of marble powder) in batches and stir thoroughly. The use of organic pigments is strictly prohibited, as such pigments cannot replicate the natural texture of the stone.
Conduct a color matching test on a concealed area of the marble, observe the color consistency, and adjust the amount of pigment added until the color perfectly matches the stone.
Prepare a sufficient amount of filling material at one time to avoid color differences caused by batch mixing.
Joint Filling Operation
The filling process requires precise operation to ensure the gaps are completely filled without air bubbles remaining.
Material Mixing: Mix the A and B components of epoxy resin according to the ratio specified in the product manual, and stir thoroughly for 2–3 minutes until uniformly mixed. For micro gaps with a width < 0.2mm, a small amount of transparent resin can be added to dilute the epoxy resin, improve material fluidity, and ensure it fully penetrates the gaps.
Adhesive Application and Filling: Use a small trowel or putty knife with a width ≤ 2 inches to fill the mixed material into the gaps, and press firmly to expel air bubbles, ensuring the gaps are fully filled. For deep gaps, adopt a layered filling process (each layer with a thickness ≤ 3mm), and proceed to the next layer after the previous layer has initially cured.
Surface Leveling: After filling, scrape off excess material with a trowel to make the surface of the filling layer slightly higher than the marble surface by 0.2–0.3mm, to compensate for the shrinkage of the material during curing.
Curing and Polishing Treatment
Adequate curing is crucial to ensure the filling material reaches its maximum strength, while polishing treatment can integrate the filled area with the surrounding stone.
Curing and Maintenance: Follow the product manual strictly for complete curing. The full curing time of epoxy resin is usually 24–48 hours. During the curing period, do not step on or touch the filled area, and maintain a clean and dry environment.
Grinding Treatment: After the material is fully cured, grind the filled area sequentially with diamond grinding pads from coarse to fine (starting with 50-mesh or 150-mesh pads, and gradually switching to 300-mesh, 500-mesh, 800-mesh, 1000-mesh, 2000-mesh, and 3000-mesh pads) until the surface of the filling layer is flush with the marble surface.
Polishing and Brightening: After grinding, polish the filled area using a marble polishing agent and a polishing machine (equipped with a wool polishing pad or a nano polishing pad) to restore the stone’s gloss and achieve a virtually invisible filling effect.
Post-curing Protection Treatment
After polishing, wipe the marble surface with a dry cloth to remove grinding dust. To enhance the protection effect, apply a layer of marble protective agent to the entire stone surface (including the filled area) to improve the stone’s water and stain resistance and extend its service life.
IV. Professional Construction Precautions
Avoid Contact with Acid and Alkali Substances: Marble is a carbonate stone with poor acid and alkali resistance. Corrosive cleaners such as vinegar and bleach are strictly prohibited during cleaning and maintenance to prevent corrosion of the stone surface and damage to the filling layer.
Strictly Control Construction Environment: Construction should be carried out in a well-ventilated environment with the ambient temperature controlled at 15–25℃ and relative humidity < 60%. Extreme temperatures or high humidity can affect the curing effect of the filling material.
Special Treatment for Large Gaps: For large gaps with a width > 10mm, the same type of marble gravel can be mixed into the filling material to enhance structural stability. Alternatively, cut repair blocks from leftover marble of the same type, embed them into the gaps, and then perform bonding and polishing treatment.
Regular Inspection and Maintenance: After filling, inspect the gaps every 6–12 months. If cracking or wear of the filling layer is found, repair it in a timely manner to prevent further damage.
V. Avoidance of Common Construction Mistakes
Filling without thoroughly cleaning the gaps, leading to poor material bonding and premature failure of the filling layer.
Improper color matching, resulting in obvious color differences between the filled area and the stone surface.
Insufficient curing time and shortened maintenance period, leading to reduced strength and durability of the filling material.
Using ordinary cement mortar for filling, causing marble discoloration and cracking due to thermal expansion and contraction.
Conclusion
Marble joint filling is a technical process that integrates material selection, precise operation, and detailed control. By following the operational specifications outlined in this guide—fully evaluating joint characteristics, selecting suitable filling materials, strictly implementing the cleaning process, accurately completing color matching, and standardizing the integrated process of filling, curing, and polishing—professional-grade and long-lasting repair effects can be achieved. Whether for residential decoration or commercial projects, standardized joint filling treatment not only restores the aesthetics of marble but also effectively protects the stone from damage and extends its service life. For high-difficulty projects such as large-area marble floors, complex marble mosaics, or gaps caused by structural issues, it is recommended to consult professional stone maintenance companies to ensure construction quality.